How to Use Pagetual
Welcome! Now that you've got Pagetual installed, let's take a quick tour of what it can do. Don't worry, it's designed to be simple and work automatically for most sites.
The Basics: Just Scroll!
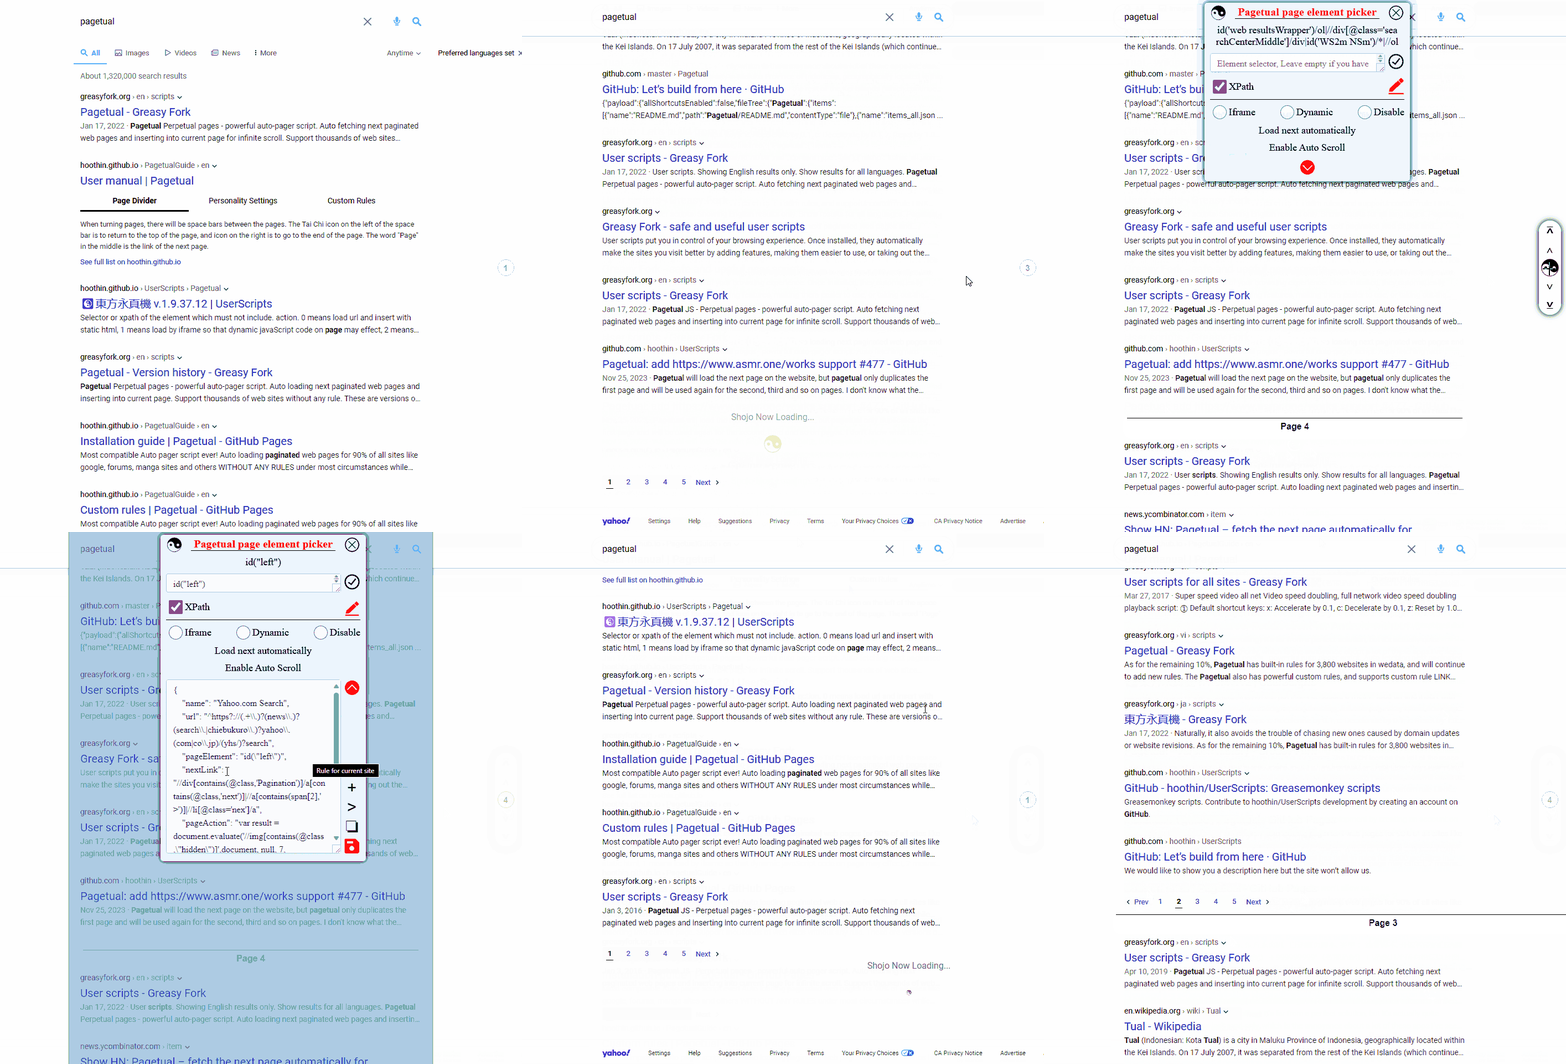
For most websites, you don't have to do anything at all. Just visit a site with multiple pages, like a search on Bing, and scroll to the bottom. You'll see Pagetual automatically load the next page for you. Easy, right?
The Page Divider
As you scroll, you'll see a small bar appear between pages. This is the Page Divider, and it's more than just a separator.

- ☯️ (Tai Chi Icon): Click this to instantly jump back to the top of the page.
- "Page X": This shows you which page you're on. You can even click the number to jump to a specific page!
- 🔽 (Target Icon): Click this to zip right down to the very bottom.
- Want to stop auto-loading? Just click anywhere on the divider bar.
Pro Tip: You can hide the divider entirely in the settings for a seamless, immersive experience.
The Command Menu
Need to make a quick change? Click your script manager's icon (like Tampermonkey) in your browser's toolbar, and you'll see a menu for Pagetual.
- Configure: This is your control center! It takes you to the main settings page where you can customize everything.
- Disable on this site: Temporarily turn off Pagetual for the website you're currently on.
- Force Join: Is a site not working correctly? This is your secret weapon. It forces the next page to load, which can fix stubborn or oddly-coded websites.
- Update online rules: This manually checks for updates to any community rule lists you've subscribed to.
Making It Your Own: Key Settings
On the Configure page, you can tweak Pagetual to work exactly how you want.
- Write History: Turn this on to save your spot. When you leave a page and come back, you'll return to where you left off in the scroll.
- Open in New Tab: Force all links from loaded pages to open in a new tab.
- Pre-load Next Page: For an extra speed boost, Pagetual can start loading the next page's images and content before you even get there.
For Power Users: Custom Rules
While Pagetual's automatic mode is great, sometimes you need more control. Custom rules let you tell Pagetual exactly how to handle a specific site.

This is an advanced feature, but we've made it as easy as possible with a visual selector tool. Just click the element on the page you want to grab, and Pagetual will generate the code for you.
To learn more, check out our detailed Custom Rules Guide.